Repository Naming
Use lowercase kebab-case with the approved cb- prefix for Cloudberrie internal repositories.
cb-website
cb-manual
cb-studio-board
cb-eventlumi
cb-aifa
cb-infrastructure
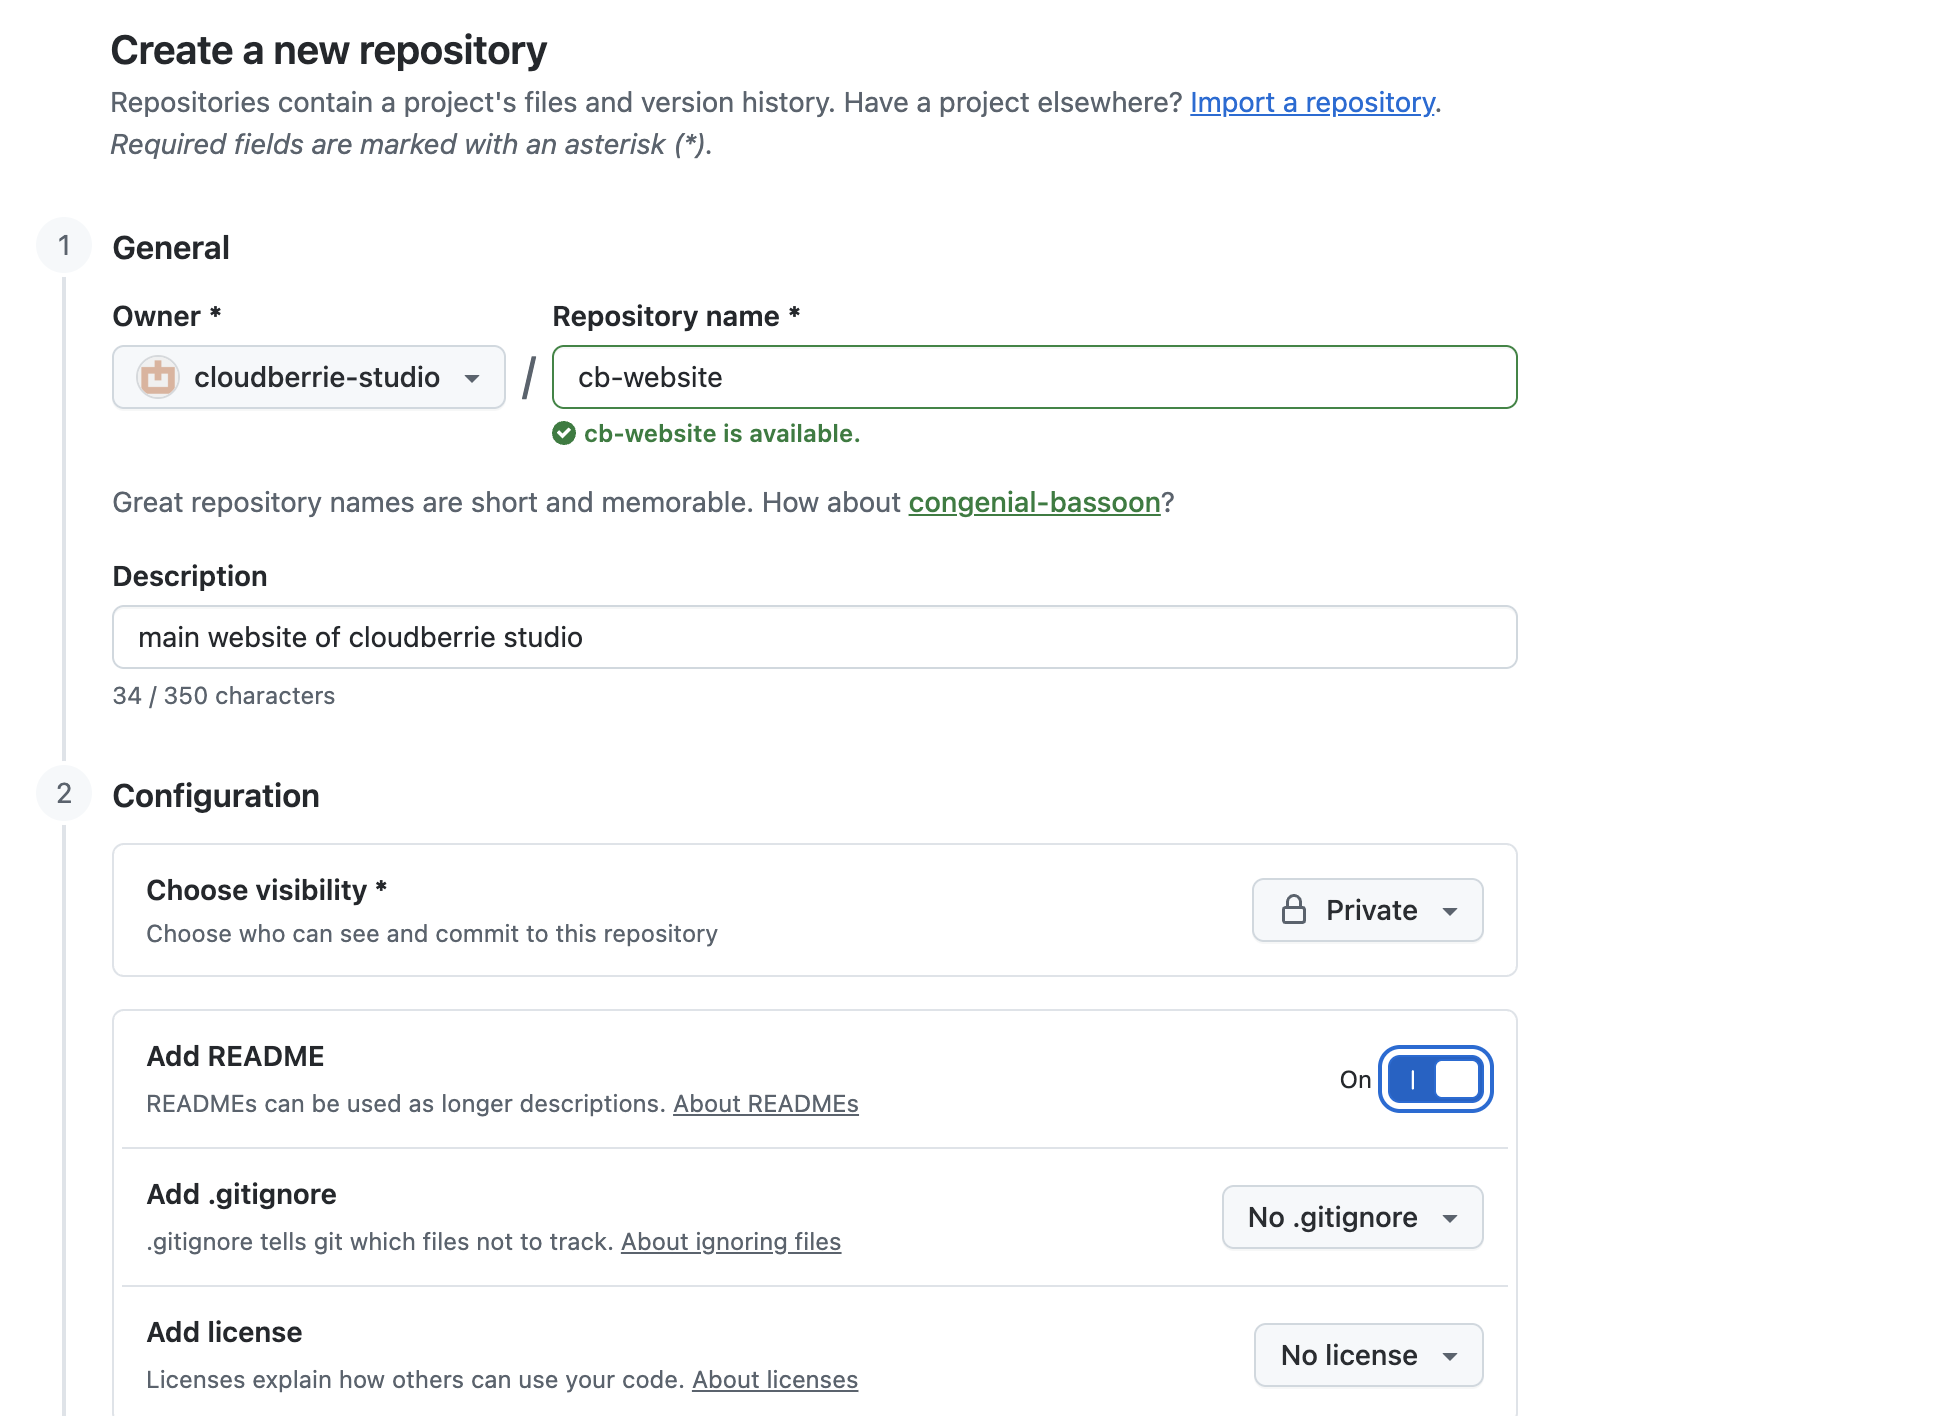
Create the Repository
- Open the Cloudberrie organization.
- Select Repositories → New repository.
- Owner: select the Cloudberrie organization.
- Repository name: enter the approved name.
- Description: explain the product and deployment target in one sentence.
- Visibility: Private.
- If local project files already exist, leave README,
.gitignore, and license unchecked to avoid an unnecessary first-commit conflict. - If starting from zero in GitHub, initialize with a README and the appropriate
.gitignore. - Create the repository.
Required Repository Files
| File | Purpose |
|---|---|
README.md | Purpose, setup, commands, environments, deployment, owners |
.gitignore | Exclude dependencies, local configuration, secrets, build outputs |
CONTRIBUTING.md | Branching, commits, PRs, reviews, testing |
SECURITY.md | Private security reporting route and supported versions |
CODEOWNERS | Review ownership for files or directories |
LICENSE | Only when a licensing decision has been made; private company code does not require an open-source license |
Repository Metadata
- Add useful topics such as
cloudberrie,cloudflare-pages,firebase, or product-specific tags. - Set the website/homepage URL after deployment.
- Disable unused features only after confirming they are not part of the workflow.
- Add repository owners and teams explicitly.